Getting Pritunl working with Let’s Encrypt CA

Recently I was working on a fresh install of Pritunl’s VPN server on a VM. Pritunl’s software is free for simple configurations and is a really easy way to setup a VPN server in a few minutes – it’s also compliant with OpenVPN standards so you can use either the ubiquitous OpenVPN client or Pritunl’s own branded client. The Pritunl client has some advantages like easy one-step configuration with a similarly configured Pritunl server (vs importing a settings files) but otherwise they are largely functionally the same.

One of the new features that was recently (within the last year?) added to Pritunl was the ability to use Let’s Encrypt certificates in the server. Previously, you had to either get a third-party plugin or run Pritunl behind a reverse proxy to get Let’s Encrypt or any other certificate working (without upgrading to a more expensive paid license).

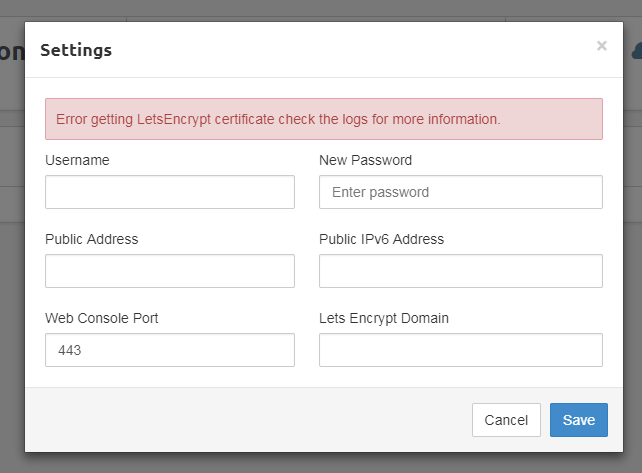
However, the Let’s Encrypt function wasn’t working. Normally, you would set the domain name for the certificate in the settings dialog box, then hit “Save” and the backend would run and verify the domain, fetch the certificate, and apply it all automatically.

Now, I’m just getting “Error getting LetsEncrypt certificate check the logs for more information.”

Okay, lets take a look at the logs:

[patient-plateau-8521][2017-11-16 16:08:58,851][INFO] Parsing acme account key...
[patient-plateau-8521][2017-11-16 16:08:58,981][INFO] Parsing acme CSR...
[patient-plateau-8521][2017-11-16 16:08:59,075][INFO] Registering acme account...
[patient-plateau-8521][2017-11-16 16:08:59,850][ERROR] Failed to get LetsEncrypt cert
Traceback (most recent call last):
File "/usr/lib/pritunl/local/lib/python2.7/site-packages/pritunl/handlers/settings.py", line 711, in settings_put
acme.update_acme_cert()
File "/usr/lib/pritunl/local/lib/python2.7/site-packages/pritunl/acme.py", line 49, in update_acme_cert
cert = get_acme_cert(settings.app.acme_key, csr)
File "/usr/lib/pritunl/local/lib/python2.7/site-packages/pritunl/acme.py", line 24, in get_acme_cert
app.set_acme,
File "/usr/lib/pritunl/local/lib/python2.7/site-packages/pritunl/acme_tiny.py", line 111, in get_crt
raise ValueError("Error registering: {0} {1}".format(code, result))
ValueError: Error registering: 400 {
"type": "urn:acme:error:malformed",
"detail": "Provided agreement URL [https://letsencrypt.org/documents/LE-SA-v1.1.1-August-1-2016.pdf] does not match current agreement URL [https://letsencrypt.org/documents/LE-SA-v1.2-November-15-2017.pdf]",
"status": 400
}
acme_domain = u'this.is.my.domain'

Oh…great. Um, it looks like there’s a problem with the agreement URL which are basically the Terms of Service for using Let’s Encrypt. The solution was actually very easy.

SSH into the sever and edit the main configuration file:

/usr/lib/pritunl/local/lib/python2.7/site-packages/pritunl/settings/app.py

In my config, it was on line 124. Edit the line to the newest agreement and save and close.

 'acme_agreement_url': 'https://letsencrypt.org/documents/LE-SA-v1.2-November-15-2017.pdf',

Re-compile the Python binary and restart the Pritunl server, then try setting your domain name again.

sudo python -m compileall .
sudo service pritunl restart

This time it worked like a charm for me. Done!


Continue Reading

That New Computer Smell

http://pcpartpicker.com/b/sjyXsY

This build was based on the Dan-Cases A4-SFX mITX case that started it’s life in the [H]ard|OCP forums and evolved into a Kickstarter campaign. The purpose of this build was make a living room computer / custom Steam box but is currently being used as my main PC until I get my 2011v3 build completed.

The GA-Z170N-Gaming 5 motherboard was purchased during Amazon Prime Day at a steep discount and had several months of use in another case stress testing before I put it into it’s home in the Dan-Cases A4-SFX case.

32 GB of RAM was selected to provide plenty of headroom when using creative applications like Premiere and Photoshop.

This build originally stated with a GTX980 but evolved into the GTX1080 because of the long wait for the case’s Kickstarter campaign.

The 950 Pro NVMe SSD was purchased during a coupon campaign from jet.com – I originally wanted to keep the machine fully SSD but the price of a 2TB NVMe SSD was cost-prohibitive.

Due to the low profile requirements to jam a HSF into the case, I selected the Cryorig C7 cooler. However, there was excessive fan noise from this cooler – particularly when overclocked

The processor was then delidded with a Rockit Cool delidding tool and the thermal compound was replaced with Coollaboratory’s Liquid Pro interface material. This was able to provide over a 30 degree drop in temperatures and allowed me to keep the fan speed very low to keep noise down.

Continue Reading

How To: Add Certificate To Windows 7 RDP

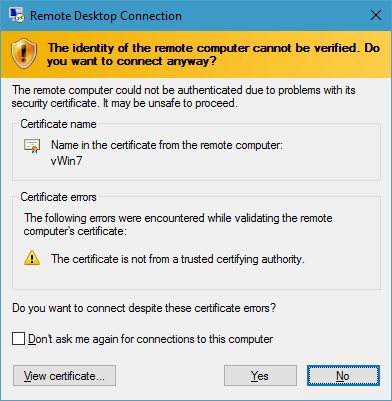
This was more something that was bothering me than anything absolutely necessary, but I wanted to get a properly signed certificate installed on my remote Windows 7 machine that’s hosted in a datacenter as a VM. Every time I connected to it, the RDP client would display an error that the RDP server wasn’t providing a proper security certificate:

More annoying than anything, really. However, since I do have several certificates that are signed this was a problem I could remedy.

Continue Reading

Enabling SLI on non-nVidia supported platforms

nvidia-geforce-gtx-battlebox-sli-bridge

Enabling SLI on non-nVidia approved platforms has less of a pain-in-the-ass since nVidia allowed SLI on Intel chipsets, but enabling SLI on a workstation designed to take Quadro cards so it will work with Geforce cards is a little more of a pain in the ass.

In my configuration, I’m trying to enable SLI on an older Dell Precision 690 workstation with an SLI riser card. Normally, nVidia and Dell only allow with very expensive Quadro video cards in this configuration. However, I got myself a pair of GTX260 Core 216 video cards for very cheap and so I wanted to do a little experimenting to get this to work.

Plenty of modifications exist to enable SLI on non-supported configurations, and the solution I chose was DifferentSLI. However, this software patches the nVidia kernel-mode driver and then signs it with a self-signed certificate that obviously isn’t chained to Microsoft’s CA. This means for Windows to load, it has to be put into Test Mode to allow the kernel to accept a self-signed certificate and load the driver.

Since I already had Class 2 validation with StartCom, I embarked on a poorly-documented journey to sign the modified driver file with my Code Signing Certificate from StartSSL and load it, so I wouldn’t have to put Windows into that ever-annoying Test Mode.

Read the write-up here:
http://andrewpeng.net/computing/enabling-sli-on-a-dell-precision-690-with-geforce-video-cards

Continue Reading

Fix Common SSL/TLS Problems in Apache2

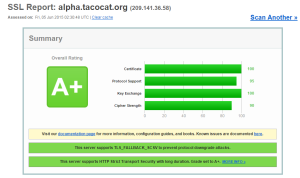
Qualys SSL Labs has some great tools to check your server’s SSL/TLS installation to make sure they don’t fall victim to common vulnerabilities or exploits that seem to be discovered every month. If you’re running an Apache2 installation, securing your server against most SSL/TLS vulnerabilities is as easy as enabling the headers Apache module, and then a few lines to your SSL configuration.

First, enable the headers module so Apache2 can modify headers sent to the client:

pengc99@alpha:~$ sudo a2enmod headers
Enabling module headers.
To activate the new configuration, you need to run:
 service apache2 restart
pengc99@alpha:~$

Then add the following lines to your SSL configuration:

# Make the server secure
 SSLProtocol all -SSLv2 -SSLv3
 SSLHonorCipherOrder on
 SSLCipherSuite EECDH+ECDSA+AESGCM:EECDH+aRSA+AESGCM:EECDH+ECDSA+SHA384:EECDH+ECDSA+SHA256:EECDH+aRSA+SHA384:EECDH+aRSA+SHA256:EECDH+aRSA+RC4:EECDH:EDH+aRSA:AES128-SHA:DES-CBC3-SHA:DHE-RSA-AES128-SHA:!RC4:!aNULL:!eNULL:!LOW:!3DES:!MD5:!EXP:!PSK:!SRP:!DSS:!DH

Restart your server:

pengc99@alpha:~$ sudo /etc/init.d/apache2 restart
Restarting web server: apache2 ... waiting .
pengc99@alpha:~$

That’s it! Now go run the test at https://www.ssllabs.com/ssltest/ and marvel at your server’s newfound security!

ssl

Continue Reading

Update your Nexus 5 to 5.1.1 Without Losing Data

Android Lollipop 5.1.1 was recently released for the Nexus 5 as a maintenance update to the latest OTA update of 5.1.0 to fix numerous issues, such as an intermittent non-response camera and excessive memory usage leading to crashing applications.

If you have a rooted phone or a phone with a custom recovery, you may find that the OTA update doesn’t work on your phone – this is because the update process now checksums and verifies partitions such as recovery before performing the update. If the partitions don’t match the expected stock ROM, the update process will terminate. Having a rooted phone (with the su binaries), modified radio, modified recovery, or custom ROM may all contribute to an update failing and bombing out.

Continue Reading

On USB Flash Drives

Bought another USB flash drive the other day, and suddenly it clicked in my head that I purchased a storage device that was $40, reads and write at well over 100mbyte/sec, and holds 128gbytes, in the palm of my hand.

Benchmarked my old and new drive. Technology has come a long way since 1.44mbyte floppy disks.

Kingston DataTraveler Ultimate 32GB
Sequential read, 1 file, 1024MB: 126MB/sec
Sequential write, 1 file, 1024MB: 82MB/sec

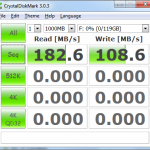
PNY Turbo 128GB
Sequential read, 1 file, 1024MB: 183MB/sec
Sequential write, 1 file, 1024MB: 109MB/sec


Continue Reading
1 2 3 5