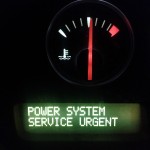
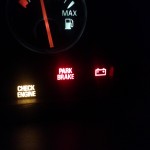
On 20120208 at 92,415 miles, I got a red triangle indicator and a “POWER SYSTEM SERVICE URGENT” message in the message center, along with the battery warning icon illuminated in the idiot-light panel on the right, followed by a MIL/CEL shortly after:
Since I was already close to home, I shut off all the accessories like air-con, lights, and radio and drove home. When I got home, I checked the battery voltage with a digital multimeter and found the battery was only showing 10v so I quickly hooked up a battery charger and did a little research. It turns out the alternator on the V8 model is prone to failure.
Unfortunately, it looks like this alternator is specifically made for this engine, the Volvo B8444S which is only used in the Volvo S80, XC90, and Noble M600. Production volume is low, so it’s difficult to find a replacement that is reasonably priced. My first call was to the local Volvo dealer to see how much a new one cost. Unsurprisingly it was near $800 for a new alternator from the dealership, and with the additional 3 hours of labor to change it, brings the total cost of swapping out an alternator to a whopping $1300. Not happening.
The stock unit is made by Bosch:
- Current output: 180 amps (there is also a 140 and 160 amp model, but the V8’s were only fitted with the 180amp model)
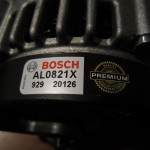
- Bosch part number: AL0821X (You can substitute AL0821N for a NEW unit)
- Volvo OEM part number: 36000791
It’s also important to note that 2003-2004 V8 model uses a self-regulating alternator where the current and voltage regulation system is built inside of the alternator unit. Starting from 2005, the regulation is controlled by the ECU. The regulators are still inside of the alternator, but the current and voltage output is now controlled by the ECU instead of internally by the alternator.
You CAN put in a 2003-2004 V8 alternator in a 2005+ V8, however you will get a red triangle warning “POWER SYSTEM SERVICE URGENT” and a battery idiot light because the ECU cannot communicate with the alternator. The alternator will continue to function normally and will charge the battery, but you will still get the warning messages. The cost difference isn’t significant, so it’s worth it just to get the 2005+ alternator and fix it correctly.
Next stop was to check common online retailers of Volvo OEM and aftermarket parts:
- VolvoWholeSaleParts.com – $492.29
- SwedishAutoParts.com – $310.00 for aftermarket, $617.78 for OEM, +$75 core charge for both
- BuyAutoParts.com – $149.60 + $150 core charge for an aftermarket equivalent, $228.65 + $75 core charge for a rebuilt Bosch OEM, or $361.25 for a brand new Bosch unit
In the end I ordered a rebuilt Bosch alternator from BuyAutoParts.com – they called me a few minutes after my order to confirm that it would fit my car and also to add $75 for the core deposit, which will be refunded when the original bad alternator is returned.
Start by letting the car sit for at least 5 minutes since you took the key out. This allows the ECM to store any running parameters and go into a safe state to disconnect the power. Some impatient or well-meaning garages have damaged or destroyed ECM’s by removing the battery cable too quickly after shutting off the engine! Don’t take the risk, just go have a drink, use the bathroom, clean the garage, whatever for 5 minutes, then go into the back and disconnect the battery! While the battery is disconnected, hook up a battery charger to the battery. This will be explained below.
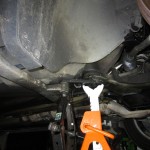
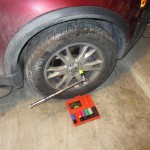
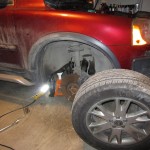
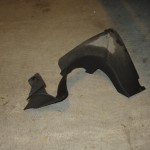
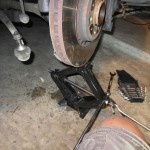
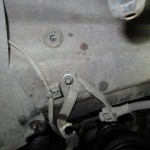
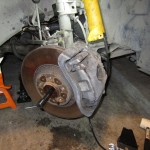
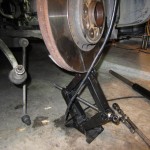
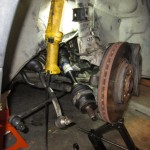
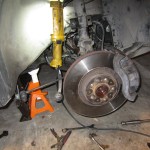
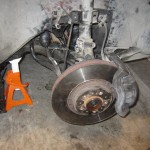
Since the V8 powerplant is so crammed in the engine bay, the engineers chose to install the alternator at the bottom behind the passenger side front wheel. The first step is to remove the wheel so you can access the panel and components behind it. Make sure the vehicle is jacked up and on a secure jackstand – you can see the mounting point I used below. After the wheel is off, there are a series of plastic flange nuts that have to be taken off so the lower component cover can be removed. Remove the nuts and then remove the panel.
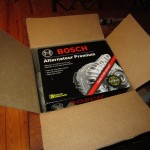
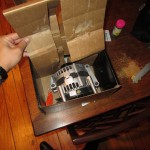
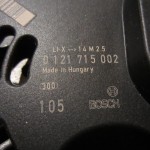
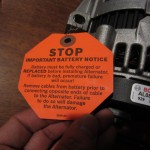
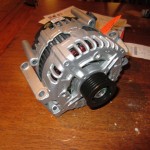
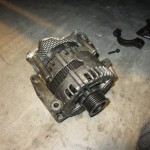
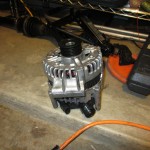
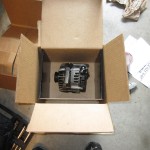
Here is the refurbished alternator shipped from Bosch – this particular unit was made in Hungary and has the part number AL0821X. Also attached to the alternator is a red tag that explains some warnings about installing the alternator. Interestingly, the warning says to make sure either a brand new battery is installed, or the battery is fully charged before starting the engine with the new alternator. This goes back to the fact that we connected a charger to the battery after disconnecting it from the car, right? You did put a charger on the battery, right? Right? Put a charger on the battery!
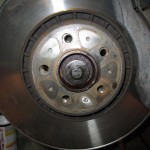
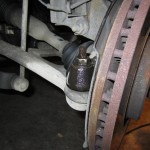
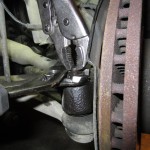
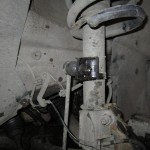
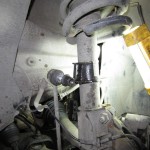
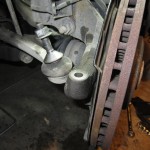
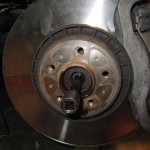
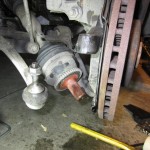
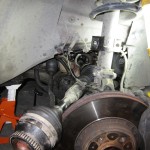
Now take a look at the hub assembly – there is an axle nut on the front that needs to be taken off. Remove this, the steering linkage connection, and the swaybar endlink connection to the hub assembly. Spray them down thoroughly with a penetrating lubricant before to make the job easier. The joints may rotate in the socket, so you might need to improvise something to take the nut off. It will also help to jack up the entire hub assembly with a floor jack to make it much easier to remove the swaybar endlink connection to the strut body.
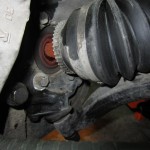
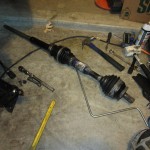
With the linkages removed, it’s now time to remove the axle from the hub assembly. Make sure the ABS sensor and the brake lines are out of the way – I unbolted the bracket and tucked them away. Turn the hub assembly hard to the left all the way as if you were making a hard left turn – turn it all the way and then get a punch with a blunt point, like a socket and socket extension. Put the punch into where you removed the axle nut and hammer away to remove the axle from the hub assembly. You will need to play with the hub angle and varying the pressure on the axle to get it to pop out.
Before the axle will come out from the transaxle willingly, the axle bearing cradle has to be opened. It’s a lot easier than it sounds – follow the axle into the car until you come across a U-shaped piece bolted in at two opposite points. Remove the bolts, and give it a firm whack with a drift and rubber mallet and it will come off. Now, jack up the hub assembly again as if you were removing the swaybar endlink bolt, firmly grab the axle with both hands, and give it a firm tug. The axle will literally pop out of the transaxle. You will need to fidget with the hub and the axle to maneuver it out. You will be able to remove it without removing the lower ball joint, it will just take some time, and some effort to wiggle it out. Remove the jack that’s holding up the hub assembly.
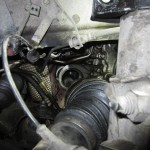
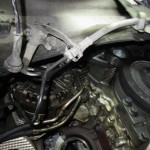
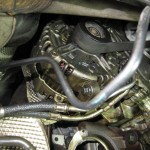
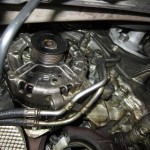
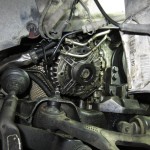
See the alternator hidden up there? Before you remove the three bolts, you will need to disconnect the wiring harnesses to the alternator. The alternator output positive cable was easier for me to remove by getting a small 1/4 inch socket wrench from under the car. Reach up from the wheel well, up behind the engine, and up over the alternator and remove the nut that holds the positive cable in and remove it. The alternator field wiring was easier for me to remove from the top of the car – you will need to remove the upper engine mount assembly that goes between the strut towers, the rear plastic engine cover, and the plastic accessory belt cover. Beware – on the accessory belt cover, there are two Torx screws holding it in. With the plastic covers off, you can reach behind the engine from the top of the engine bay, reach the alternator, and disconnect the field wiring.
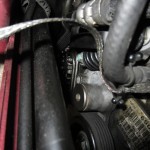
Now we will need to remove the accessory belt around the alternator. You can do this one of two ways – you can do it from under the car, pull the accessory cable towards you, and put a socket on the crank pulley, and turn the crank pulley clockwise – this will force the belt to derail over the alternator pulley and pop it off. The recommended way is to get a long socket wrench like a breaker bar, put a 19mm socket on it, and attach that to the welded-on nut on the belt tensioner from the top of the engine bay. You will need to pull on this towards the front of the car firmly for about 40 seconds and slowly the belt tensioner will release and you can slip the belt off the top idler pulley. Take your time on this! If you exceed 177 lb-ft on the tensioner, you can damage it so just do it slowly!
It’s just a matter of unbolting the three bolts (two lower, one upper) that hold the alternator to the engine block and dropping it out! This was what took by far the longest for me – it’s a tight squeeze to get the alternator out of this little hole you made. Get the alternator out, and turn it around. You need to remove the heatshield on the back of the old alternator and install it on the back of the new alternator, reusing the Torx mounting screws.
Now, you’ll need to negotiate the new alternator back into the engine bay and bolt it up. The alternator alone is nearly 20lb – it will be extremely beneficial to have someone hold it while you navigate the mounting bolts in – be very careful not to gouge or strip these threads! The engine block that you are bolting the alternator onto is made of aluminum! Once the alternator is bolted up, install the output positive cable and the field cable – again for me it was easier to do the output positive cable from the bottom, and the field cable from the top. Get yourself a beer, you’re halfway done!
Get your 19mm socket and long socket wrench again. Install the alternator belt around all the accessories except the top idler pulley. From the top of the engine bay, put the socket wrench on the tensioer, and give it a firm and steady pull for about 40 seconds to a full minute. The tensioer will release and allow you to slip the belt over the upper idler pulley. I was able to do this with one hand in a few tries, but it would probably be easier to do with a helper. Again, do not exceed 177 lb-ft on the tensioer pre-loading bolt!
Now, jack up the hub assembly again and install the axle back into the transaxle – putting it back in required some wiggling of the axle, the hub assembly, and adjusting the height with the jack. Make sure the bearing surface is clean and then bolt the bearing cradle back up. Now comes the tricky part – turn the hub assembly to the hard left again and get a long prybar or long thick screwdriver and brace it against the lower A-arm, and the other end near the ABS sensor teeth. With enough careful prying, and fine adjustments with a large hammer, you CAN get the axle back into the hub assembly without removing the lower ball joint. Trust me on this, it is possible. I had no tools available to remove the lower ball joint so this was the only option I had!
With the axle back in place and the hub assembly still jacked up, connect the swaybar endlink back to the strut housting and lower the hub assembly. Reinstall the axle bolt and the steering linkage. I found I didn’t need to hold the center bolt section on tightening. Re-install the ABS sensor line and brake line brackets.
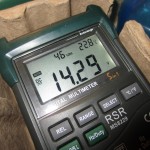
Now, clean off the engine bay and reconnect the battery. Double check that the belt is installed correctly and the alternator is wired correctly, and the engine bay is free and clear of tools, rags, and foreign objects. Start the car and check the voltage across the positive junction and a ground – you should get above 14 volts now! I was able to get 14.29 volts. Yay! The alternator works! Shut off the engine before it gets warm so you can work in the engine bay without getting burned and so the radiator fan doesn’t run continuously. You can now install the wheel, the accessory belt cover, the rear engine cover, and the upper engine mount. Pat yourself on the back well done, and soak in the feeling that you didn’t have to pay Volvo over $1000 to fix the car. Enjoy! The fact that you disconnected the battery cable will clear any CEL/MIL. Please leave any questions or comments below!
Did you find any of the information useful? Have I helped you save a bit of money / time / frustration? I've spent a lot of time taking pictures and meticulously documenting everything to post it here. I'd really appreciate it if you could send me some money via Paypal! This helps defray the cost of running this website and also provides me with beer to continue writing these articles. Thanks!


42 Comments
Partner, VIDA has nothing on you. This is a most helpful posting that is about to save me cash. Many thanks to you.
volvo has a new protector & air duct to help cool the alternator. part # 30795212, 30795440
Thanks for the helpful write up. Took mine to independent shop and they wanted $1300 for new alternator and install. Dealer wanted $1200. Was able to get remanufactured for $280 and even though took me a while spread over 3 days, I got it done. And it works! Saved me over $1000. Never would have been able to do it without your help. Best writeup I’ve seen of ANY Volvo repair. And great pics. Many, Many, Many thanks.
I spent most of today wrestling this alternator out of my 07 and have a few opinions. 1) getting the drivetrain parts out of the way was certainly the easy part-and I did have to jack the brake disk-and that’s a tricky affair with the volvo scissors jack. Be careful not to bump it or it will drop hard against you as it’s spring loaded-and be careful not to puncture cv joint! Removing anything on top of alternator required getting on top of engine-though the top bolt was last to be removed and required really long extensions from underside with universal ext. Coolant lines assembly had to be unbolted from engine block. The tensioner was another story-not sure applying pressure for a minute released it adequately. Would help to know whether the 9mm allen that appears to be the pivot point needs loosening-and I’ll figure that out when I install. Oh-and there is a belt diagram on another site which helps a bit. What also would help is using a 19mm socket which is 2″ deep as a 1.5″ deep socket doesn’t quite have clearance from the coolant line coming out of the manifold on top of the block. I do not look forward to this next wrestling match of installing-but when I start doing the math-it definitely feels like I’m earning it the hard way.
Installation complete-and prior to install-I found I could get some slack from the undercarriage to the Fuel lines I mistakenly thought were coolant lines-and then could move the stainless tube assembly up-and mostly out of the way from on top by removing the solid black plastic shielded tubes out of the holders. Getting the bolts in worked best by starting two on bottom and getting the alternator about 1/4″ from the block and then lifting it a little to get top bolt started. You have a jack point on the A arm-and you need to lift adequately to accommodate the cv joint to get high enough to feed it level into the tranny. I then lowered it again to line up the feed in the wheel axle. The spring loaded tensioner released exactly as you described. Not the best mechanic project for someone out of practice-but very satisfying-though I have to get a tap to fix the threads my center punch mangled where the axle bolt goes. Though I put the wheel back on this allows for more battery charging. The message light is gone and she’s 99% done! Thanks for posting!
I have the same problem. Mechanic put in a Bosch computer controlled rebuilt alternator and the light won’t go out. New battery that went dead, but supposedly is charged. HELP?!?
Mike
just wondering if you could tell me how to get plastic cap off battery cable terminal & is it a nut that holds cable or something else that holds it. AS FOR THE FIELD EFFECT WIRE ITS JUST A REGULAR TYPE PUSH IN COMPUTER PLUG RIGHT THANKS ANDREW DAVE
Thanks, Andrew! Great work and documentation.
I started the process of removing the alternator after reading your post. It didn’t sound too hard. Well, 6 hours later, I still can’t get the top bolt out of the alternator. What did you use? I tried my open end, closed end, socket. I just can’t get on the whole bolt. Also, can’t get to the electrical, any tips??
Hi, its been a while so I don’t remember the exact details on how it was done, though I don’t remember anything especially difficult beyond the labor and time required to complete this. Perhaps a good swivel socket would be useful. I may have done the electrical connections from the top after removing the plastic engine trim. Hope this helps!
Seriously. Why can’t every car issue have a stud like this in solver mode! Thank you. Shocking the dealer quotes on this issue.
Did you work out what failed? Was it the voltage regulator? I don’t imagine that the diodes would fail, but you never know. A new regulator is pretty cheap if that’s all that’s wrong it’s a very cheap fix compared to a new alternator from the dealer.
I have just finished fixing mine. I only replaced the regulator (Bosch F00M346056 or F00M346097 – ebay $55). Got the alternator bench tested prior to re-installation and was in really good condition except for regulator.
To add to Andrew’s great post. I highly recommend a good quality 1/4″ socket set with a short & long extension bar and a universal joint.
I had to also remove a few bits Andrew didn’t. I took out the 2 bolts on the lower end of the strut to assist getting the axle out. I removed the other side of the U-shaped piece held in with 4 large bolts and a small bolt up near the gearbox. I also removed a black plate the runs perpendicular to the U-shaped piece to get access to the bolts.
So all fixed to $55 for a regulator and $10 for 10 new vovlo rivets to attached the mud guard back on. Oh and more swearing and cursing than I’ve done in a long time.
Just finished . 2 of us about 6Hrs. Wouldn’t have been able to do it without your help. Saved about 1000.00 . Thanks from Canada. Every bolt and every nut was an issue. Found it easier to remove alt. mounting bolts first and turn the alt. so the wiring bolt and plug were exposed from the top. We got the top mounting bolt out and back in from the top using a bent 10MM
box end ratcheting wrench . Had to bend it to suit. We removed the fuel lines hold down nuts and out of the rail on top and lifted them high out of the way. They have to go back down after you get the alt. in and before you bolt it down. Hope this helps. Thanks again Andrew. Ken
Oh man, did this ever help me out to no end. Just replace the alternator in my ’07 V8 XC90 and the steps are spot on. Dealer quotes and mechanic quotes were through the roof. Took me a couple of days, only because I had to wait for the alternator to arrive. Thanks again for your info on this!!!
Very detailed explanation and picture illustration. Installed a new AL0821N and went to a garage tech, and still saved me over $1,000!
Helped me a lot!
Ok I’m halfway through this process and the only question I have is on the 2pin field/sense terminal plug i only see one green wire pinned in, so I’m either missing a sense wire or field wire on that plug I suppose, how was this thing working in the first place?
Curious if anyone had dealt with a damaged idler pulley mounting post (the aluminum bushing that is fixed to the engine)? Unfortunately one of the pulleys failed on my 05 XC90 V8 which resulted in a “mangled” post. Looks like my only choice is hacksaw off the twisted remains, grind smooth and install a new custom bushing to reduce the 17mm I.d. pulley bearing down to my bolt size…make sense? Any similar stories/advice out there?
Thanks for the write up. I have the alternator out. I just have to put everything back together tomorrow. Like Brenton, I took the other half of the axle bearing cradle out. This allowed the alternator to come out easily. I also pulled the entire strut assembly out. It is just 3 nuts on the strut tower and three bolts connecting the control arm (leave the ball joint in place a remove the whole assembly-it is heavy). This allowed the axle to come out with ease. Took an extra 15 minutes, but I bet I made that back with the extra space it allowed me to work.
We love our ’07 XC90 and at 208K miles, she has been good to me. We actually are a two XC90 family (wife drives the low mileage ’13). But, man, this is a lot of effort to replace an alternator. I am not that old and I remember being able to do an alternator in 1 hour on a Ford truck, BMW 3 series and some other models. The XC90 alternator DIY is not for the faint of heart. But, to save a $1,000+, worth it. At least for those that like turning the wrenches. Thanks again, Andrew. Modest Paypal contribution coming your way.
Thanks for the write up. I have my alternator out, went to a rebuild shop and they didn’t recommend a rebuild or just replacing the VR. Debating if I should buy the new Bosch or the reman. Anyone who has done this and used a reman, did it last long? I don;t ever want to do this job again, getting it out was awful.
Your write ups are fantastic. I happened to come across your site looking for control arm repairs. I’ve discovered this section relating to the alternator. Thankfully when mine went bad (2007 xc90 V8) I happened to have an extended warranty that took care of it. What was interesting though, volvo has a heat shield or something that is recommended to be added with new replacements. As you have stated, this is a known issue with the v8 engine.
Happy to find this should the issue arise again.
Getting prepped to start this on my 06 v8. Swear jar in place.
good day where on the cluster must the D+ wire for the alternator go to. or is there someone that can send me a wiring diagram?
I had a shop do the alternator on my 08 XC90 and after they finished, my ABS on the front right wheel started throwing a tantrum.
Codes:
C0082-17: Brake system malfunction indicator circuit voltage above threshold
C0034-07: Right front wheel speed sensor mechanical failures
Any ideas or has anyone else run into this?
Likely ABS tone ring had a tooth chipped when it was removed from the hub.
Great step by step Andrew. It was a great help to me anyway. Everything you mentioned was exactly how I encountered it, and actually made the job alittle easier for the DIY person. The only thing I had a hard time with was the hot wire to the alternator. On my car the a/c line runs right over top of it lol, however dropped the 3 bolts on the alternator and twisted it and got them right off. Thank you again, you have been another life saver.
Great article! I just had my mechanic replace the alternator on my 08 XC90 V8. But he told me he was not able to move the air duct from the original Volvo alternator over to the Bosch AL0821N replacement I got. He was able to move the heat shield over. Would you know how essential the air duct is? Will it overheat without that one in place?
Also, I ordered a Continental 4060990 belt, which supposedly would fit the vehicle, but my mechanic said it didn’t fit and he had to use the belt that was on. It was replaced less than 15000 miles ago and looked fine, so it shouldn’t be a big deal. But do you know if the Continental 4060990 does not fit the 08 Volvo XC90 V8, or if I just got a belt that was not up to spec?
Thanks again,
Svein
I had MA state inspection done yesterday – on leaving station was suddenly bombarded with dash lights and messages, initially “overcharge” then “anti-skid” then “Power System Service Urgent” with red battery indicator. After charging battery, last message and light come right back on, and alternator only charging at 11V. Could this be electrical rather than alternator, and is there any way to test before removing alternator from car?
Very good instructional through axle and belt removal- right up to removal of unit and disconnecting of power and wire harness – despite hours of efforts I could not disconnect old unit and was skeptical that it would fit out the small hole even if I could. After admitting defeat, and preparing myself for dealer enema, I found I could not re-install axle without strut/hub removal. Moral of story: if you think this may be more than you can accomplish, you may be better off
I see you don’t monetize andrewpeng.net, don’t waste your traffic, you can earn additional bucks every month with new monetization method.
This is the best adsense alternative for any type of website (they approve all websites), for more details simply search in gooogle: murgrabia’s tools
great put up, very informative. I ponder why the opposite experts of this sector do not realize this.
You must proceed your writing. I’m sure, you’ve a huge readers’
base already!
Having just done this myself, a couple of comments:
1) I pulled the driveshaft (as suggested) but there was NO way my alternator was coming out with the remainder of the driveshaft bracket installed. I had to remove 3 8mm screws that hold the driveshaft shield and then removed 4 13mm bolts that hold the rest of that bracket in place. Only after this could I drop the alternator into position.
2) on my 2008 XC90 there was a small black cap covering the main power wire from the alternator. This part of the process is blind so not only was this not obvious, it proved difficult to get enough leverage from the bottom to pull that plug out.
Notes on a 2007 S80 V8 additional steps: less space to get the alternator out! The easiest way to get the axle out and get more room is to move the lower A-arm out of the way. Remove the large bolt through the front bushing into the frame member (18 mm socket I think) and the whole arm can move out. This will work for the XC90 also and allow the axle to come out far easier without affecting alignment.
I actually took the entire assembly out: put a jack under the A-arm outer end under the bearing spindle. Then remove the 3 strut bolts 13mm at the top under the plastic cowling that covers the wiper mechanism. Disconnect the link and steering knuckle from the strut underneath and the brake assemblies and set aside on the frame rail. Remove the two large bolts through the rear A-arm bushing bracket that also goes through the anti-roll bar bracket. 18mm bolt head, 19mm nuts on top and the (heavy!) entire A-arm, strut assembly pulls off the frame. Lower jack and move aside. Now you can sit in the wheel well to wrestle with the alternator.
Also, before the bracket that hold the axle bearing can come out, remove the axle heat shield 2 8mm bolts. Remove the bracket from the block 15mm bolts. Then remove the final 3 bolts that hold the alternator. Turn the alternator clockwise so the air duct tube on the rear faces up, and weasel the whole thing under the 2 fuel lines (you loosened these, right?) and much cursing as you finally get it out.
TRANSFER THE HEAT SHIELD AND AIR DUCT TO THE NEW ALTERNATOR!
Neil’s hint: after you remove the heat shield 4 torx screws and the duct (twist slightly counter-clockwise) there are 4 torx screws and the large center nut to the stator that hold on the rear cover to the alternator. The Volvo rear cover can pop off the old alternator and replace the same cover on the OEM Bosch alternator! Now your new alternator looks exactly like the Volvo alternator. Put the new alternator cover on the old alternator to return the core for credit.
As they say, installation is the reverse of the removal. Cheers.
John and Neil, any tips for getting the lower control arm reinstalled after removing with strut as an assembly? I’m struggling to get the front bolt to line up with capture nut while under tension from coil spring.
Thanks,
SL
2007 S80 V8
Thank you a lot for the brilliant things I learned today
dmaox7
jz4ims
andreew how did you remove top alternator bolt with your4 method. working on my old xc90 and followed your lead. down to removing that bolt and diconnecting wiring but see noway of getting to top bolt. this is an 2005 v8 any help will be great help thanks… olddaddy