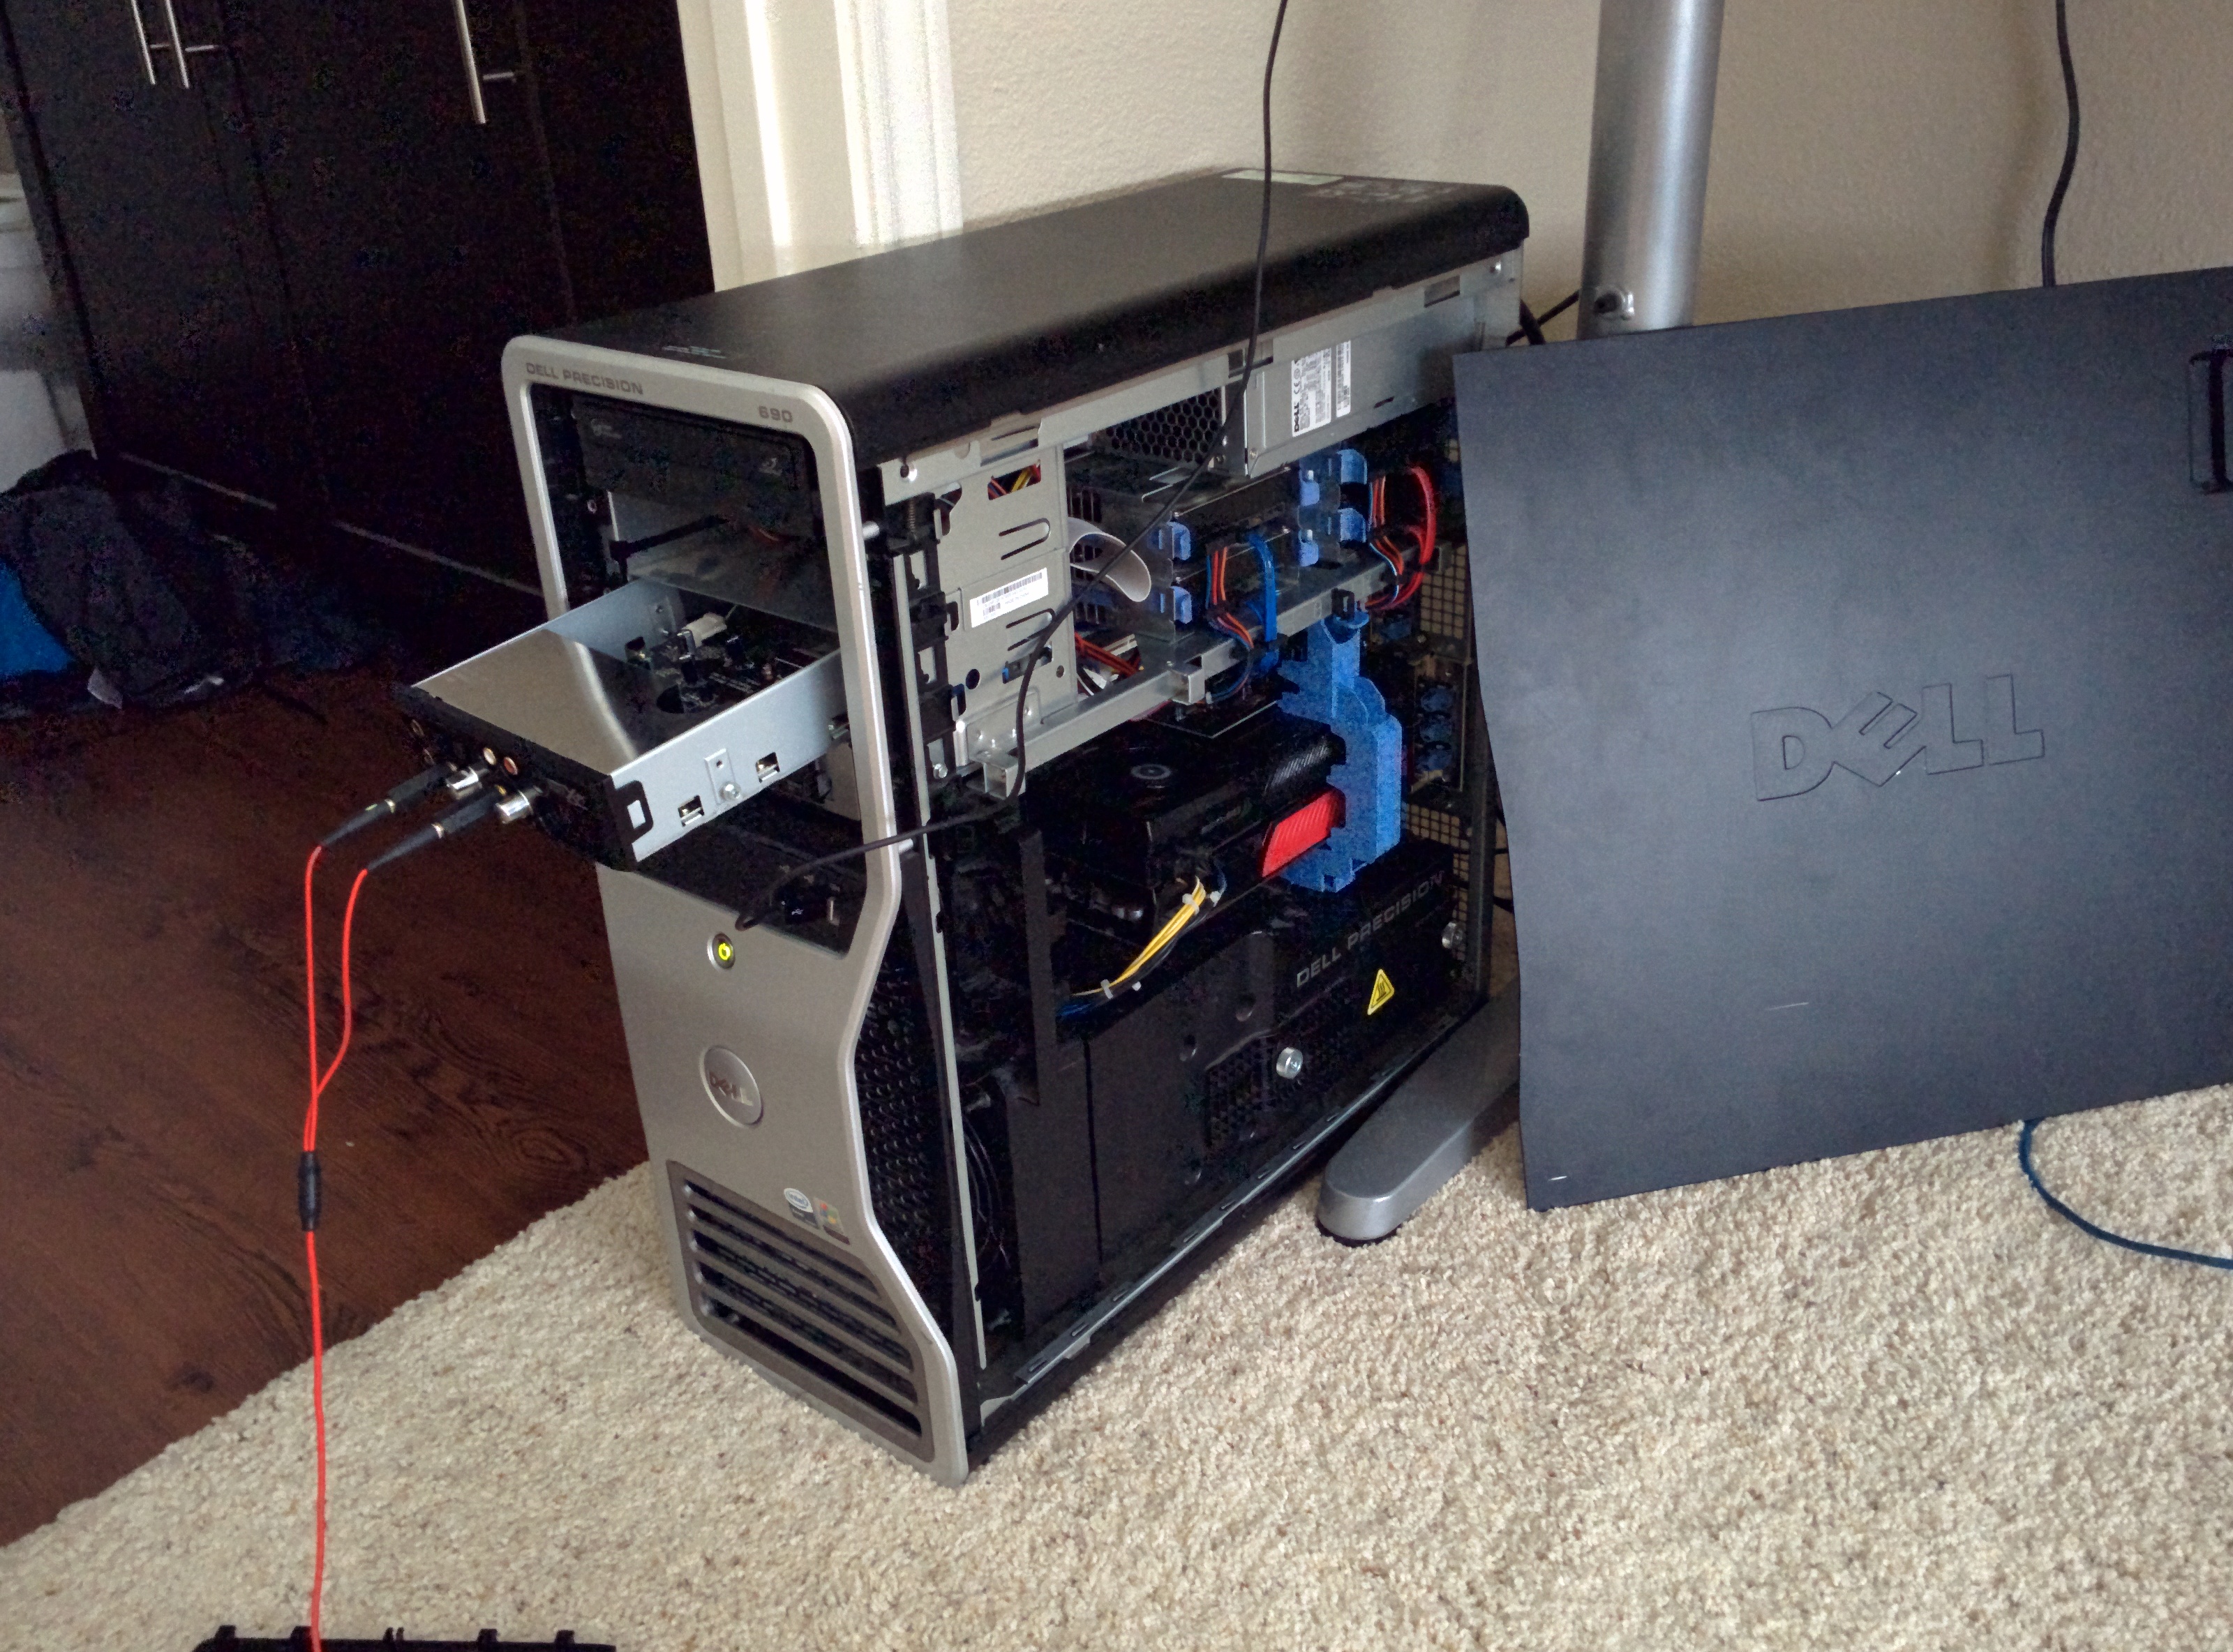
I have a Dell Precision 690 workstation:
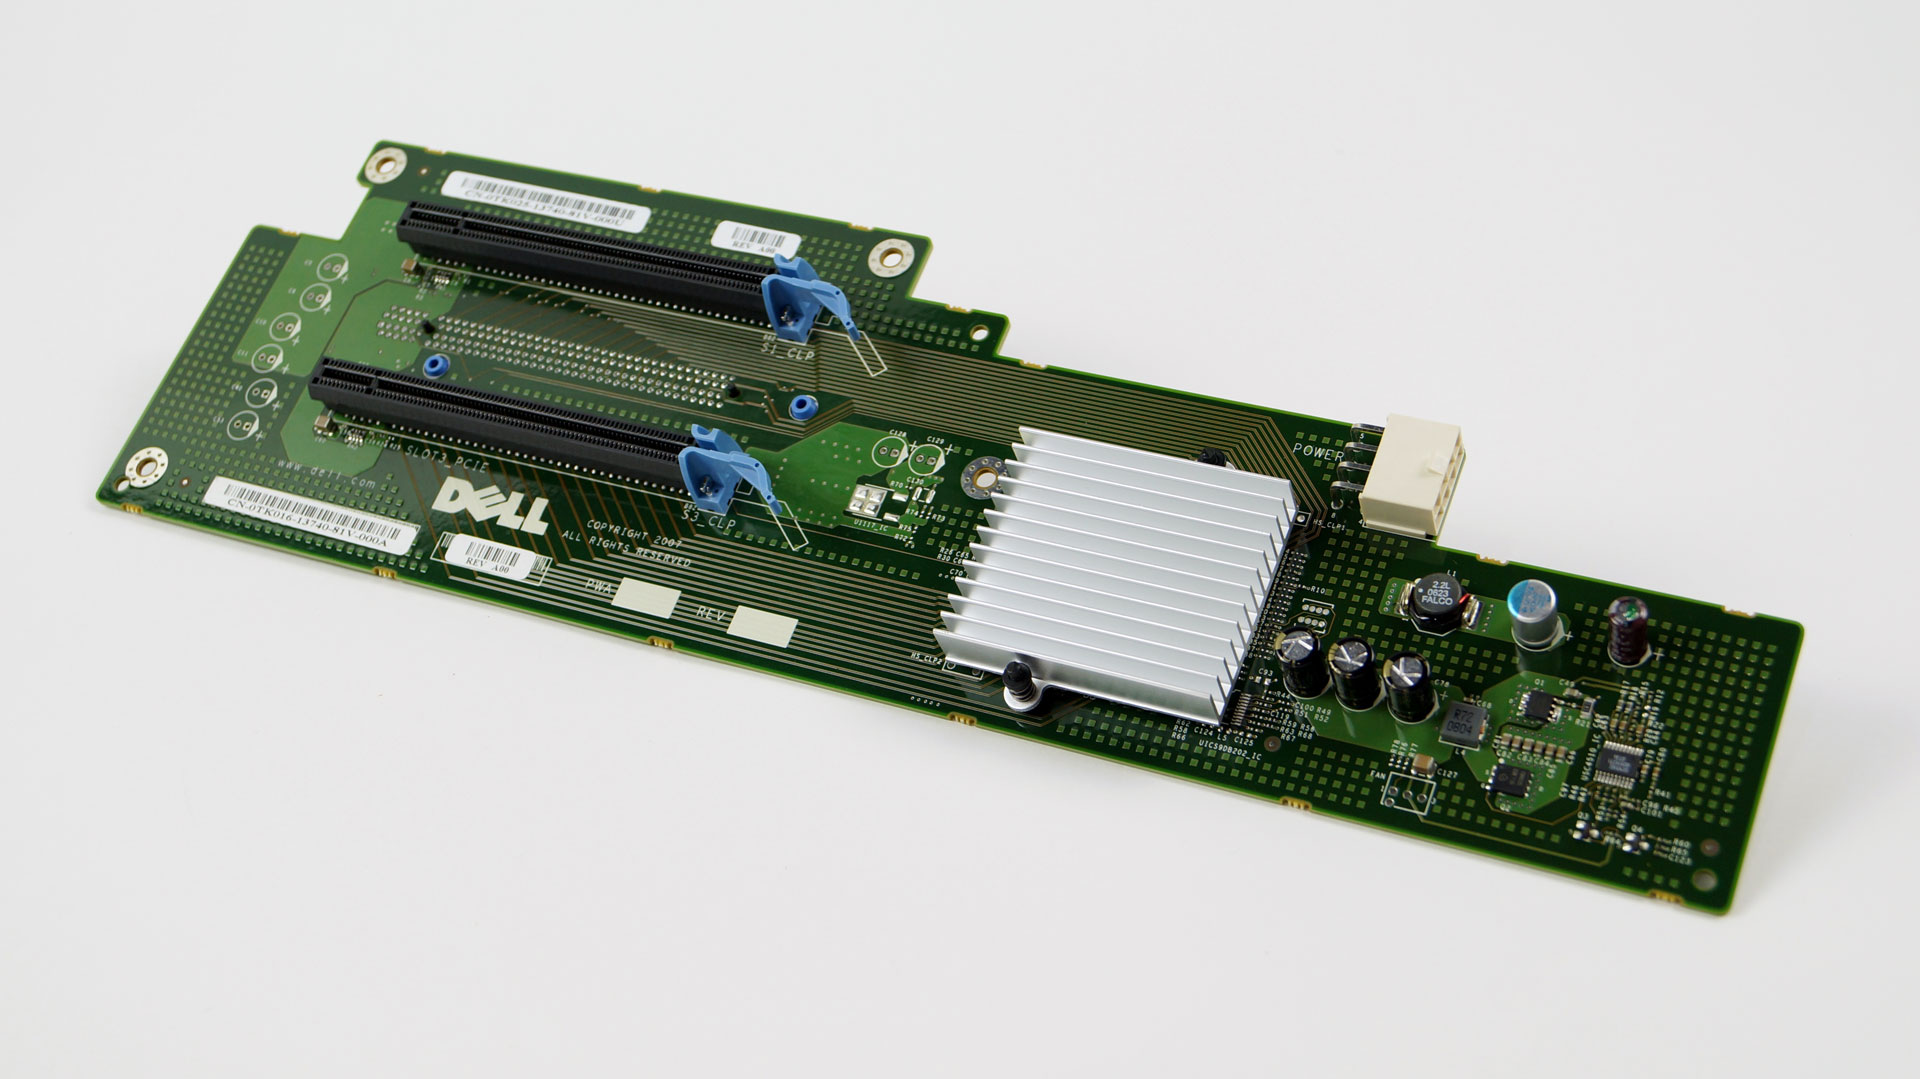
It uses an add-on board to allow SLI video cards in specific mother-ship-approved-only-configurations – in this case only with nVidia Quadro video cards since the Dell Precision 690 was a workstation-class computer.
However, I found myself gaming a lot more and I wanted to experiment with SLI video cards with consumer-grade GeForce cards. This turns out to be very difficult because of several factors – most notably that even though SLI is certainly possible (with very expensive Quadro video cards), it’s been disabled in software.
Some searching of the internet revealed a project that patches the nVidia driver to allow SLI on unsupported motherboards and in unsupported configurations – https://github.com/EmberVulpix/DifferentSLIAuto
However, after going through the installer batch file, it looks like it creates a self-signed certificate, puts Windows into a configuration to allow the self-signed certificate, and then installed the patched driver file.
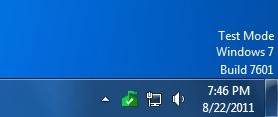
Beyond the security implications of allowing untrusted and self-signed driver packages to be installed, it also puts Windows into a mode where your background is modified with an obnoxious TEST MODE banner:
Sorry. Nope, not having any of that.
Before we start, note the list of required materials:
- An OpenSSL installation (to generate CSRs (Certificate Signing Requests)) and compile your PFX (Personal File Exchange) file.
- A code-signing certificate from a CA (Certificate Authority) that Microsoft recognizes – more on this below
- The Microsoft Windows SDK package installed on your computer (for signtool.exe – to digitally sign files)
- DifferentSLI patcher package located on Github
First order of business is to get a code-signing certificate from any of the CAs (Certificate Authorities) that Microsoft recognizes:
- AddTrust External CA Root
- Certum Trusted Network CA
- DigiCert Assured ID Root CA
- DigiCert Global Root CA
- DigiCert High Assurance EV Root CA
- Entrust.net Certification Authority (2048)
- GeoTrust Primary Certification Authority
- GeoTrust Primary Certification Authority – G3
- GlobalSign Root CA
- GoDaddy Class 2 Certification Authority
- Go Daddy Root Certificate Authority – G2
- NetLock Arany (Class Gold)
- NetLock Platina (Class Platinum)
- Security Communication RootCA1
- Starfield Class 2 Certification Authority
- Starfield Root Certificate Authority – G2
- StartCom Certification Authority
- TC TrustCenter Class 2 CA II
- Thawte Primary Root CA
- Thawte Primary Root CA – G3
- UTN-USERFirst-Object
- VeriSign Class 3 Public Primary Certification Authority – G5
- VeriSign Universal Root Certification Authority
Of all these, you’ll probably recognize Verisign and Thawte as the “good old guys” from the certificate industry, but now that this technology has been around for so long there are many more to choose from.
I already had a StartCom certificate which I use to secure services on a few of my other servers, and their certificates are CHEAP. Regular plain Jane class-1 certificates are free (yes, FREE) and class 2 certificates (which require identity validation) only cost a one-time $60 validation fee. What’s important here is that you’ll need to obtain a class-2 or higher level of verification before StartCom will issue you a code-signing certificate.
Once you get your identity verified and pay the verification fee, you will need to generate a code-signing certificate. I used a Linux server with OpenSSL to generate my CSR (Certificate Signing Request) and private key:
openssl req -new -newkey rsa:4096 -keyout mykey.pem -out myreq.pem
OpenSSL will ask you a bunch of questions, but in my case none of the responses mattered except for the password for the private key because my CA will replace all the information with what they have on file for me as part of the identity verification. Just make sure to set a secure password for the private key that you can remember or put in your password manager.
At this point you will have your private key (mykey.pem) and your CSR (myreq.pem). Copy them to where you have DifferentSLI extracted to. They are just regular old text files, so now open up the CSR (myreq.pem) with notepad and copy the contents into your clipboard.
Go back to your CA and generate a new Code Signing Certificate. They will ask you to put in your CSR – paste in the CSR (myreq.pem) that you generated with OpenSSL After a little bit of churning, your CA will return with another block of text, which is your Code Signing Certificate. Save this certificate as “mycert.pem” along with your private key (mykey.pem) and CSR (myreq.pem).
After you have your certificate (mycert.pem), you need to generate the PKCS#12 certificate that Microsoft’s Signtool recognizes:
openssl pkcs12 -export -out mycert.pfx -inkey mykey.pem -in mycert.pem
Depending on which CA you used, you’ll need to download the corresponding intermediate chain certificate from Microsoft here. Save this file in the same location as your certificate file (mycert.pem). You can rename it to mychain.crt to simplify the next step.
Now, we need to locate the original nvlddmkm.sys driver file on your computer. On my Windows 7 64-bit Ultimate installation, it was here:
C:\Windows\System32\drivers\nvlddmkm.sys
Copy that file to where you have DifferentSLI extracted to and run the patcher.

The patcher will patch back up the original driver file, and then patch it. Once we have the patched nvlddmkm.sys file – we need to sign it so Windows will load it. Without a digital signature, Windows will only load the driver if you enable self-signed certificates and enable Test Mode. However, we we saw before, this places an annoying banner on the desktop and also is generally an insecure setting because now anyone can load kernel modules with a self-signed certificate which could lead to root kits and other nasty software that you don’t want.
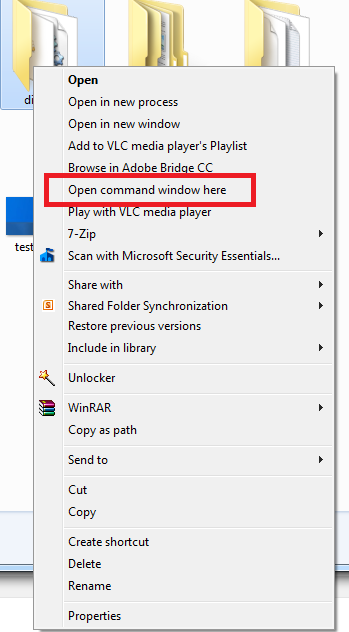
Open up a Command Prompt window where you extracted DifferentSLI – I found the quickest way to do this is to go up one directory, then right-click the folder where DifferentSLI is installed while holding the SHIFT key. In the menu that pops up, select “Open command window here”
At this point, you should have your PFX certificate (mycert.pfx), your Microsoft chain-certification (mychain.crt), and your nVidia driver file (nvlddmkm.sys) in the same directory as where DifferentSLI was extracted.
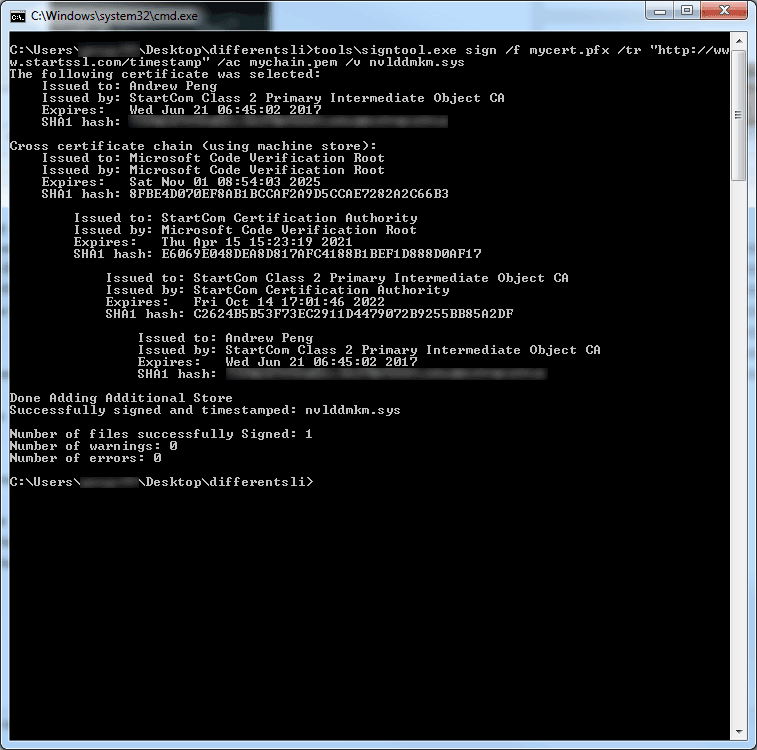
In your command prompt window, run the following command to digitally sign the modified nVidia driver file:
tools\signtool.exe sign /f mycert.pfx /tr "<URL to your Certificate Authority's Time Stamp Server>" /ac mychain.pem /v nvlddmkm.sys
Here’s what the expected output should look like, and you can see at the top where Microsoft’s chain certificate was linked in the certificate chain:
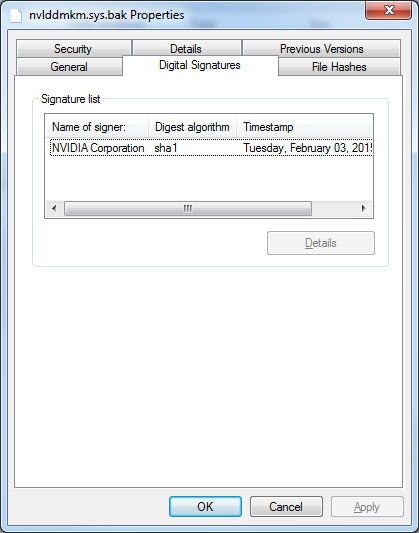
If you compare the original nvlddmkm.sys file to the modified file, you can see the original file is signed by nVidia and the new one is signed with my certificate:

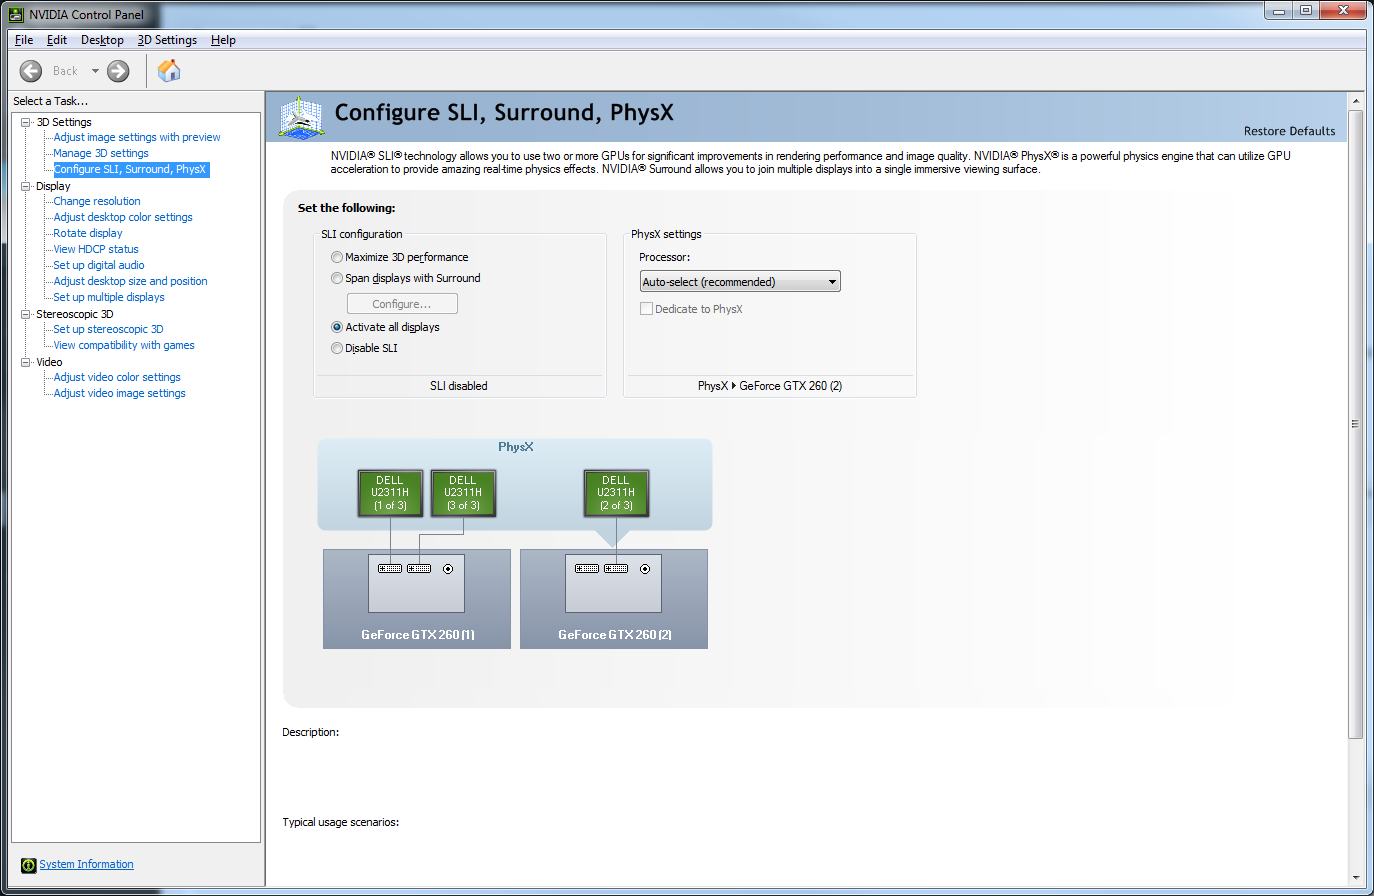
Copy the new modified nvlddmkm.sys to C:\Windows\System32\drivers\ – overwriting your original file, click through the UAC prompt, and reboot your computer. When your computer comes back up, check your nVidia display settings, and you should see SLI options are now displayed!
6 Comments
I know this is a long shot (and a gravedig), but any chance you would be willing to sign my copy of nvlddmkm.sys?
Been scratching my head all day trying to figure this out. Came to the conclusion that it would be cheaper to buy a new motherboard if it came to buying a certificate.
I don’t think this works any more with Win10, since all video drivers need to be signed through the WHCK dashboard 🙁 Does anyone know otherwise?
I am seeing this become a bigger and bigger problem, particularly with UBISoft games. It would be nice if these anti-cheat vendors would acknowledge there is a legitimate use for unsigned/test signed drivers.
This post is a jewel, Andrew. Thank you for posting the step by step guide for resolving SLI issues on your 690 not to mention how to get a L2 cert. I’ve had my T7400, the 690’s younger sibling, since around 2009. At that time a lot of gov systems were coming off lease and 5400 series servers, workstations and fully buffered ecc memory was relatively inexpensive. I’d had some experience with Dell poweredge servers and my first move was to install a Perc5i card. Then I got the graphics riser adapter kit which included the riser card DPN TK025, off-set expansion card pan, CPU/Card cage fans and front fan bracket assy. Unfortunately I hadn’t read the spec sheet carefully enough. The graphics riser board covers the PCIe x 4(x8) slot the Perc5i card goes in as well as the PCI slot and the second PCIe x16 slot. To use the riser you’re basically trading two PCIeX16 slots for two SLI slots but giving up the the PCIe X4(8) and PCI slot and if I recall correctly the cable, P24, that provides power to the riser is also used to power the second set of memory risers. The graphics riser card (GRC) is a two layer PCB. The “ear” on the GRC that screws atop the memory riser card frame (CDR627) is what covers the first PCIeX slot. I did a lot of eyeballing without the card pan and using care I lopped off the ear on the GCR with a Dremel, put the riser in Slot 4, the second PCIeX(16) slot and recovered the first and second PCIe slots. The box has been running fine (aside from a few SLI issues) with 2 raid controllers (Perc6i and LSI9260-8i), memory expansion (64GB) and graphics riser 2xGTX560 cards w/sli bridge . I have pics I should publish. I did have to mod the wiring a bit as well as the card pan to shift the lifted GPUs left a couple of slots which was not a big deal. I’m working on another T7400 that expands my PCIe X 16 bus using a second GCR in slot 2 adding a USB 3.0 adapter. While I can’t break the PCIe 2.0 barrier I do have Sata III, USB 3.0 and I’ve recovered the PCI slot on a 1600Mhz fsb. (9x2Tb WD 2003fyss HDD’s) and at the moment 4xSSDs.
thsata
ooudxn
kp8nd6