Getting Pritunl working with Let’s Encrypt CA

Recently I was working on a fresh install of Pritunl’s VPN server on a VM. Pritunl’s software is free for simple configurations and is a really easy way to setup a VPN server in a few minutes – it’s also compliant with OpenVPN standards so you can use either the ubiquitous OpenVPN client or Pritunl’s own branded client. The Pritunl client has some advantages like easy one-step configuration with a similarly configured Pritunl server (vs importing a settings files) but otherwise they are largely functionally the same.

One of the new features that was recently (within the last year?) added to Pritunl was the ability to use Let’s Encrypt certificates in the server. Previously, you had to either get a third-party plugin or run Pritunl behind a reverse proxy to get Let’s Encrypt or any other certificate working (without upgrading to a more expensive paid license).

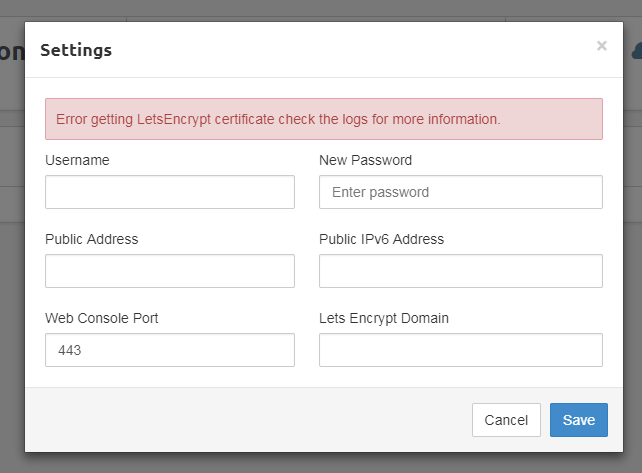
However, the Let’s Encrypt function wasn’t working. Normally, you would set the domain name for the certificate in the settings dialog box, then hit “Save” and the backend would run and verify the domain, fetch the certificate, and apply it all automatically.

Now, I’m just getting “Error getting LetsEncrypt certificate check the logs for more information.”

Okay, lets take a look at the logs:

[patient-plateau-8521][2017-11-16 16:08:58,851][INFO] Parsing acme account key...
[patient-plateau-8521][2017-11-16 16:08:58,981][INFO] Parsing acme CSR...
[patient-plateau-8521][2017-11-16 16:08:59,075][INFO] Registering acme account...
[patient-plateau-8521][2017-11-16 16:08:59,850][ERROR] Failed to get LetsEncrypt cert
Traceback (most recent call last):
File "/usr/lib/pritunl/local/lib/python2.7/site-packages/pritunl/handlers/settings.py", line 711, in settings_put
acme.update_acme_cert()
File "/usr/lib/pritunl/local/lib/python2.7/site-packages/pritunl/acme.py", line 49, in update_acme_cert
cert = get_acme_cert(settings.app.acme_key, csr)
File "/usr/lib/pritunl/local/lib/python2.7/site-packages/pritunl/acme.py", line 24, in get_acme_cert
app.set_acme,
File "/usr/lib/pritunl/local/lib/python2.7/site-packages/pritunl/acme_tiny.py", line 111, in get_crt
raise ValueError("Error registering: {0} {1}".format(code, result))
ValueError: Error registering: 400 {
"type": "urn:acme:error:malformed",
"detail": "Provided agreement URL [https://letsencrypt.org/documents/LE-SA-v1.1.1-August-1-2016.pdf] does not match current agreement URL [https://letsencrypt.org/documents/LE-SA-v1.2-November-15-2017.pdf]",
"status": 400
}
acme_domain = u'this.is.my.domain'

Oh…great. Um, it looks like there’s a problem with the agreement URL which are basically the Terms of Service for using Let’s Encrypt. The solution was actually very easy.

SSH into the sever and edit the main configuration file:

/usr/lib/pritunl/local/lib/python2.7/site-packages/pritunl/settings/app.py

In my config, it was on line 124. Edit the line to the newest agreement and save and close.

 'acme_agreement_url': 'https://letsencrypt.org/documents/LE-SA-v1.2-November-15-2017.pdf',

Re-compile the Python binary and restart the Pritunl server, then try setting your domain name again.

sudo python -m compileall .
sudo service pritunl restart

This time it worked like a charm for me. Done!


Continue Reading

Linux Network Interface Channel Bonding and DHCP

While configuring a few servers I noticed some strange behavior with mode 4 channel bonding (LACP / 802.3ad) and DHCP. You might get the following error message, no matter what you do:

Determining IP information for bond0… failed; no link present. Check cable?

The problem appears to exist in how the interface responds to link status on LACP / 802.3ad ports. The computer is trying to send DHCP packets when the interface itself isn’t ready, causing Linux to think the interface isn’t configured or has no network cable plugged in. This appears to only happen when you use mode 4 channel bonding. Mode 6 works fine. The (band-aid) solution appears to be to trick the system into thinking the interface is already configured. This enables Linux to continue sending DHCP packets until the interface is configured and negotiated successfully with 802.3ad, at which point everything works as planned. Simply insert this at the end of /etc/sysconfig/network-scripts/ifcfg-bond0 – I should note this particular example is for CentOS and RHEL so I haven’t confirmed if this workaround works for Debian based distributions.

check_link_down () { return 1; }

Continue Reading

Crisis Averted

Really thought I lost the LVM share. There might actually be a bug in the PowerPC Debian kernel that causes it to kernel panic on large LVM partitions. Ever since I switched to an Athlon MP server from my old PowerMac, it hasn’t kernel panicked since. Nice to have a large network drive at home again. Gonna take the plunge and convert the partition to ext4 while I’m at it.

pengc99@zeus:~$ sudo fsck.ext4 -fvy -C 0 /dev/mapper/MASS_STORAGE-STORAGE_LV
e2fsck 1.41.12 (17-May-2010)
Pass 1: Checking inodes, blocks, and sizes
Pass 2: Checking directory structure
Pass 3: Checking directory connectivity
Pass 4: Checking reference counts
Pass 5: Checking group summary information

342541 inodes used (0.19%)
1892 non-contiguous files (0.6%)
178 non-contiguous directories (0.1%)
# of inodes with ind/dind/tind blocks: 57159/9867/16
333728343 blocks used (91.11%)
0 bad blocks
57 large files

321274 regular files
21258 directories
0 character device files
0 block device files
0 fifos
0 links
0 symbolic links (0 fast symbolic links)
0 sockets
——–
342532 files
pengc99@zeus:~$

Continue Reading

memcached + WordPress + DreamHost Shared Hosting

The idea of using memcached on my shared hosting account had been bouncing around my head for a while; especially on my DreamHost shared hosting account. There are periods when the performance would suffer because of other users on the server, and I was also looking for a general increase in performance without having to pay for an expensive dedicated server. I should start off by saying that what I’m about to explain only works if you have a VPS or Dedicated server that you can access already. It may seem redundant for a tutorial or howto guide on how to get memcached working in a shared environment if you already have a VPS available, but the practice and procedures will be useful to allow you to run other customer PHP modules on DreamHost shared hosting. In my case, I already had a VPS server I use for Irssi but was not configured to be a web server. It’s a stripped bare DreamHost VPS with sudo / root access, and a handful of IRC applications running in screen. I had stumbled across this deal, for $5/month (on top of your regular DreamHost bill) when they were beta testing VPS servers and I had volunteered for an account; somehow my account got tagged with the discount, so I decided why not and added one to the account. Not only that, I didn’t want to deal with the migration of switching my accounts over from the shared server to the VPS; the “seamless” transition they have setup is fairly deceiving; I find that it usually borks up the websites in the transfer and requires a fair bit of mucking to get everything working again.

The first obvious problem, even before you go about installing memcached support modules for your web application, is that DreamHost’s default PHP modules for their shared hosting environments do not include memcached. Later I found out that they also don’t have a build of Imagemagick, but the procedures in this guide will apply to also allow you to install Imagemagick on your own.

Before we dive in and get our hands dirty, here’s a little background about memcached and why we want it. Memcached’s website says this about what it is:

memcached is a high-performance, distributed memory object caching system, generic in nature, but originally intended for use in speeding up dynamic web applications by alleviating database load.

The gist of the issue is that PHP is a dynamically interpreted language. Unlike traditional languages like C or Java, you don’t “compile” it, you leave it as source. When someone stumbles on your website, the request for the page pulls the source code into the PHP interpreter, which then compiles it and executes the code before sending the result to your happy web visitor. Because the code is pulled, compiled, and ran each time someone visits your website, there is usually a pretty significant overhead as your PHP slowly stumbles through the compiler. This effect is especially bad for intensive CMS systems like WordPress, which is being used on this very website.

Memcached aims to speed the process up by caching frequently used objects that your PHP code uses – in the case of WordPress, this is achieved through the use of a plugin that queries the memcached server for a cached version of the object before recreating and recompiling the object from scratch. Even with the overhead of checking before creating the object, this results in a significant savings in compilation and execution time. The tradeoff is higher memory usage (space-time tradeoff). The memory usage isn’t really significant for a single user, but can easily balloon if there’s high-traffic website that is hitting the cache often. For this application, I’m just using memcached with the default cache size of 64mb.

Continue Reading

Disabling console blanking in Debian Linux

I find it particularly annoying that the default settings in a stock base Debian install blanks the monitor after about 30 minutes of inactivity. There are a few servers that I have logged in and running htop 24×7 and it’s inconvenient to have to hit the keyboard every time I need to check in on the system.

I did a quick search on Google, but the only results were hack-ish setterm commands crammed into the rc.local or .bashrc files – sure that would work, but instead of setting it at bootup, then setting it again at login, wouldn’t there be a direct way to change the default behavior of the screen blanking? Go dig in /etc and lets see what we find:

pengc99@janus:~$ sudo grep -r setterm /etc/*
grep: /etc/fonts/conf.d/30-defoma.conf: No such file or directory
/etc/init.d/kbd:    setterm_args=””
/etc/init.d/kbd:        setterm_args=”$setterm_args -blank $BLANK_TIME”
/etc/init.d/kbd:        setterm_args=”$setterm_args -powersave $BLANK_DPMS”
/etc/init.d/kbd:        setterm_args=”$setterm_args -powerdown $POWERDOWN_TIME”
/etc/init.d/kbd:    if [ “$setterm_args” ]; then
/etc/init.d/kbd:        setterm $setterm_args
/etc/rcS.d/S16kbd:    setterm_args=””
/etc/rcS.d/S16kbd:        setterm_args=”$setterm_args -blank $BLANK_TIME”
/etc/rcS.d/S16kbd:        setterm_args=”$setterm_args -powersave $BLANK_DPMS”
/etc/rcS.d/S16kbd:        setterm_args=”$setterm_args -powerdown $POWERDOWN_TIME”
/etc/rcS.d/S16kbd:    if [ “$setterm_args” ]; then
/etc/rcS.d/S16kbd:        setterm $setterm_args
pengc99@janus:~$

Hm, /etc/init.d/kbd looks interesting, so lets take a look in there:

# This is the boot script for the `kbd’ package.
# It loads parameters from /etc/kbd/config and maybe loads
# default font and map.
# (c) 1997 Yann Dirson
< 8< ————- snip ————- >8 >
# screensaver stuff
setterm_args=””
if [ “$BLANK_TIME” ]; then
setterm_args=”$setterm_args -blank $BLANK_TIME”
fi
if [ “$BLANK_DPMS” ]; then
setterm_args=”$setterm_args -powersave $BLANK_DPMS”
fi
if [ “$POWERDOWN_TIME” ]; then
setterm_args=”$setterm_args -powerdown $POWERDOWN_TIME”
fi
if [ “$setterm_args” ]; then
setterm $setterm_args
fi

Hm, it looks like it’s looking for the variable BLANK_TIME and POWERDOWN_TIME in the config file /etc/kbd/config – lets take a look in there:

# screen blanking timeout.  monitor remains on, but the screen is cleared to
# range: 0-60 min (0==never)  kernels I’ve looked at default to 10 minutes.
# (see linux/drivers/char/console.c)
BLANK_TIME=15
< 8< ————- snip ————- >8 >
# Powerdown time.  The console will go to DPMS Off mode POWERDOWN_TIME
# minutes _after_ blanking.  (POWERDOWN_TIME + BLANK_TIME after the last input)
POWERDOWN_TIME=30

Perfect! Change these from their respective values to 0 and it will effectively disable the screen blanking:

BLANK_TIME=0
POWERDOWN_TIME=0

Restart kbd and you’re good to go:

pengc99@janus:~$ sudo /etc/init.d/kbd restart
Setting console screen modes.
Skipping font and keymap setup (handled by console-setup).
pengc99@janus:~$

Continue Reading

PowerMac G4 Debian Linux SMP Support

Update 6/9/2011: I have put in a bug report (#629492) with the Debian developers to notify them of this issue.

It looks like there is a bug in the installer for Debian Lenny/PPC that causes the installation to improperly detect SMP configurations. I have a Quicksilver PowerMac G4 dual 800 – after I finished installing Debian I noticed that the server was only seeing one processor:

pengc99@baccus:~$ uname -r
2.6.32-5-powerpc
pengc99@baccus:~$

Not to panic, the solution is actually rather simple. Just install the SMP kernel meta-package:

root@baccus:~# apt-get install linux-image-powerpc-smp
<!– lots of installing stuff here –!>
root@baccus:~#

Reboot the server, and then check the kernel again:

root@baccus:~# uname -r
2.6.32-5-powerpc-smp
root@baccus:~#

Continue Reading