Introduction
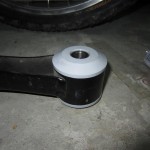
TiC (Turn in Concepts) Forward Trailing Arm Bushing – Enthusiast – $50.00
TIC (Turn in Concepts) Rear Trailing Arm Bushing – Enthusiast – $65.00
The trailing arm in a 2002-2007 GD chassis connects the frame of the car to the hub – the link trails from the frame to the front of the hub, hence the name “trailing arm”. It might be called “trailing link” as well. In a MacPherson type suspension (the 2008+ GR bodystyle uses a double-wishbone rear suspension), the trailing arm helps control the forward-rear movement of the hub. The stock soft rubber bushings allow for a lot of unwanted movement in the lateral link – both side-to-side and forward-back. The benefit of softer bushings is the ability to absorb and dampen shock and vibration to the car – preventing a lot of road noise but also giving the driver a very numb and filtered feed of information from the car.
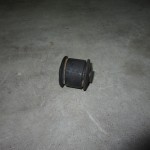
Luckily TiC (Turn In Concepts) has provided a set of “enthusiast” grade bushings that replace the stock soft rubber with stiff polyurethane. These bushings are stepped a level below the “race” level – so while they’re not quite as stiff as those, they are significantly stiffer than the stock bushings.
This guide and review is for the “Forward Trailing Arm Bushing” and the “Rear Trailing Arm Bushing” for a 2005 Subaru WRX STi – however bushings will fit all Impreza models from 1997 to 2007.
This guide and review provides information at the “weekend mechanic” level – I don’t expect the reader to have specialized and expensive shop tools that will only be used once or twice in their lifetime. For tasks that require use of those tools, the pieces will be brought to a machine shop. Of course, like everything else, the work the machine shop does will be thoroughly documented.
The install of the trailing bushings took me a few days, working on it after work and ordering parts from my local dealership as needed (Subaru Gillman Southwest of Houston). First time probably took me a total of about 4 hours. If I did it again, on a car with no rust and with a press at my disposal, I’m pretty confident it would take less than 2 hours.
Recommended Tools
An impact gun is your friend here. Let me repeat that. A good impact gun will be very very useful here. The other absolute required thing to have is a 6 point 17mm combination wrench. Do not use a 12 point wrench. You will destroy the nuts and bolts. I purchased a Sears Craftsman 17mm 6 point wrench for $8. Everything else was basic hand tools, a 3-claw puller rented from Autozone, a 3lb mini-sledge hammer (in retrospect, a deadblow hammer would have been better), a can of PB Blaster, and a c-clamp. If your car has rust (like mine), you will probably want to make sure you have access to a machine shop with a press, drill press, plasma or oxy acetylene torch, and access to spare parts from a dealership. I’ll elaborate on the bit about the torch in a bit.
- 1/2in impact wrench
- 6-point 17mm combination wrench
- 3-claw puller
- Deadblow hammer
- PB Blaster and torch
- C-clamp
- Socket wrench set
- Access to press / hacksaw + cold chisel
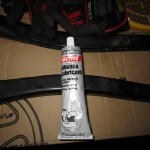
- Loctite 51360 / silicone lubricant
Component Removal
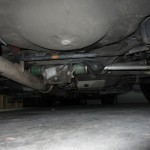
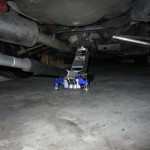
Jack up the rear of the car using a floor jack – I found the easiest way to jack up the rear of the car is to raise the car from the rear differential. A few pumps and the car is off the rear wheels. Put jackstands under the rear subframe mounts and remove the wheels. God help you if you need detailed instructions for this.
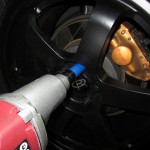
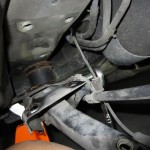
Get another jack and jack up the bottom of the hub where the trailing arm bolts into the hub. You only need to jack it up a few inches to take some of the preload out of the suspension. For some reason, Subaru saw fit to put the nut side facing outboard, and bolt side inboard. I saturated the nut with PB Blaster and put a combination wrench on the nut, and hit the bolt side with the impact gun. After about 10 seconds of hammering, it slowly came loose. Be careful when you pull the bolt out. Depending on how much you jacked up the suspension, the hub may suddenly pop free when you take the bolt out – make sure your fingers and other body parts are not in the way.
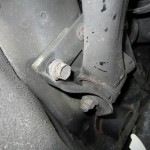
Along the trailing arm are two small bolts that hold in the ABS sensor and the parking brake cable – make sure to remove them. There is a third bolt on the forward trailing arm bracket and is a little difficult to see, but it’s there.
At this point, you can try removing or loosening the bolt that bolts the trailing arm to the trailing arm bracket. There isn’t enough room to get an impact gun in there, so you’ll need your 6-point wrench and the hammer to give it a few firm whacks. If it comes out, pat yourself on the back. Skip the next sentence. If the nut didn’t loosen from the bolt, then we’ll need to take the trailing arm out of the car while it’s attached to the bracket. There are three more larger bolts that hold the bracket and trailing arm to the frame. I found these were easy enough to remove with just a socket wrench – no impact needed.
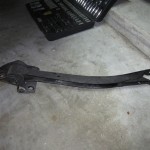
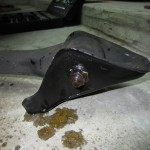
Now, you should be able to remove the entire trailing arm + bracket out of the car. Now you can clamp it in a vice, get your torch, breaker bar, impact, whatever and try to bust that nut loose. My huge electric impact and a 3 foot breaker bar could not get it loose, even with 3 days of soaking with PB Blaster and lots of creative leveraging. In the end, I bent the brackets so I gave in and called the dealership to order new parts.
httpvh://www.youtube.com/watch?v=o2q8UtvS9J0
Since I didn’t need to keep the old parts, I could get creative with getting the trailing arm off of the bracket. A few minutes on the phone with a friend and I had access to an oxyacetylene torch. Time to burn the bolt off.
Bushing Removal
Once you have the lateral link out, you have clean access to the hub. The stock bushing in the hub is very easy to remove – just get your 3-jaw puller from Autozone in there, stick an extra bolt into the hole in the bushing, line up the puller, and crank away. A few minutes later and your bushing should pop out the other side
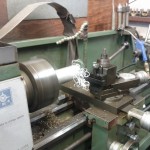
The forward bushing in the lateral link is a little more difficult. It is pressed in with a steel sleeve and is very difficult to remove without a press. Clint from Turn In Concepts has suggested burning the rubber out with a torch, and then cutting the steel sleeve out with a hacksaw and chisel. I took the trailing arms to a local machine shop instead – they machined a custom mandrel on their lathe and used it to press out the bushing and it’s sleeve. If you DIY this on your own press, please be careful. The metal collar on the bushing is in there very tight, and the rust certainly didn’t help. While the machinist was pressing the sleeve out, it didn’t come out smoothly. Instead, it made a series of very loud banging noises and slowly came out, eventually being shot out the bottom at the end of the stroke on the press.
Prep Work
With the bushings out, get a wire wheel and a high speed corded drill and polish away the inside surfaces of your trailing link. Polish the inside of the hub where the bushing goes. They don’t have to be perfect mirror shiny, but make sure to remove all the surface rust and old bushing material that may be stuck on them. Make sure to also polish away the inside of the trailing arm – there is probably going to be surface rust on it. Wipe it down with a damp cloth when you’re done. If you’re feeling especially paranoid – you can hit it with some fine finishing sandpaper for that mirror finish.
Bushing Installation (and lube!)
I had a short PM conversation with Clint in regards to the lube. He didn’t have any packets to send me when he sent me the bushings, but one thing he made clear was to use silicone lube, NOT petrolium / lithium / moly lube. Those types of lubricant break down the materials in the bushings.
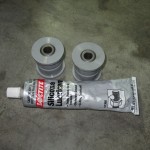
Short of driving down to the sex shop covered in car grime, silicone lube is actually commonly used to lubricate o-rings for plumbing installations. Home Depot sells the lubricant for the bushings in these little packs – but it’s expensive and hard to find, and you only get a tiny little amount. Do yourself a favor and hop on eBay and search for Loctite 51360 – it’s a pure silicone lubricant in a 5.3oz squeeze tube. I bought two of them for $18, turns out i only used about ⅓ of one tube, so about 1.7 oz, and I was pretty generous with it.
Curiously, the tubes were stamped with an expiration date.
When putting the new bushings in, again, make sure all the surfaces are clean. Liberally coat all the surfaces with the silicone grease, and press all of the bushings in. For the forward trailing arm bushing, you’ll want to coat the exterior of the bushing as well.
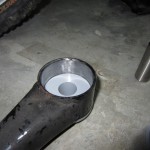
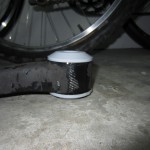
Clint at TiC was nice enough to make the replacement bushings and metal with nice chamfered edges. If you polished the inside surfaces nicely your new bushings will go in with easily – no need for a press. A large c-clamp or small vice might help, but I was able to press all of mine in (literally) by hand. Important – make sure all surfaces are clean, and use a liberal amount of lube.
Putting It Back Together
- Trailing arm to frame: 85ft-lb
- Trailing arm to hub: 66 ft-lb
Installation is in the reverse order of disassembly – but there are a few things to watch out for.
When installing hardware, make sure you anti-seize the threads – you don’t want to completely coat everything because the antiseize will attract road particles and such and may actually contribute to the corrosion, but just enough on the threads will help to make sure the fasteners come out easily in the future.
When installing the trailing arm, you may need to get creative with the scissor jack and bracing it against the hub to make the hub line up with the trailing arm. Mke sure the exterior of the bushing is lubed up as well so the trailing arm can articulate without binding on the bushing.
There is no need to get the car aligned if all you changed was the bushings in the trailing arm. Go out for a drive and try out those fancy new bushings!
Impressions
In my case, these bushings were installed at the same time as the lateral link bushings, so my subjective review of these are with both of them installed at the same time.
The first thing that I noticed is that there is more vibration and road texture / noise being transmitted into the cabin. Since I didn’t buy the STi as a luxury cruiser barge, this really isn’t a detriment, but it has the interesting effect of allowing you to feel everything on the road…directly injected into your ass. Those hairline cracks in the pavement, the occasional rock or pebble under your tire, and all of the road texture is now communicated straight to your butt. The car feels more like a performance car now and less like a compromise. I can’t comment on if it made the car noisier because my exhaust drowns everything out, but there is a definite, significant improvement in how much stiffer the rear end is and how much information is now beamed into your ass.
Over the weeks after the install in driving the car, I’ve noticed that the rear end is quicker to respond to throttle and brake transitions. The full throttle – clutch – shift – back to full throttle transition feels much crisper. Braking feels more direct, with less transition between when I stab the brake, and when I feel the car respond. High speed cornering, especially with curved highway on-ramps that have textures and unperfect road surface lets you feel much more about how the car handles and responds to input and road conditions.
Another pleasant thing I’ve noticed is that the bushings have eliminated my rear wheel hop. Previously with the soft stock bushings, a hard launch using the Cobb Launch Control would make the rear end of the car hop, causing a pretty violent shuddering in the cabin as the tires fought for traction on the pavement. This also made hard launches unpredictable and difficult to be consistent from launch to launch. Now, I get a chirp and a smooth transition from tire-spin to traction and the car claws it’s way out of the hole. I never thought the bushings would have made such a dramatic difference in the launch.
If you’re thinking about getting these bushings, or anything else from Turn In Concepts, please let them know that atomicfire on NASIOC referred you! I don’t get anything in return, but it helps Clint to know who’s reading what before buying his stuff. Also as a disclosure – please note that the bushings in this write-up were provided as review samples at no cost to me.
Did you find any of the information useful? Have I helped you save a bit of money / time / frustration? I've spent a lot of time taking pictures and meticulously documenting everything to post it here. I'd really appreciate it if you could send me some money via Paypal! This helps defray the cost of running this website and also provides me with beer to continue writing these articles. Thanks!




















1 Comment
Great write up, kudos.